
QR Table Ordering allows customers to scan a code at their table, browse your menu, place an order, and pay directly from their phone. This creates a fast, contactless ordering experience and ensures every order is correctly attached to the table where it originated.
Set Up Your Tables and QR Codes
- Log in to your Taplo dashboard.
- In the left-hand menu, go to Catalog→ Seating.
- Select Create a Seat to create a new table or service area.
Enter the seat name (for example: _Table 1_, _Table 2_, _Lane 6_, etc.).
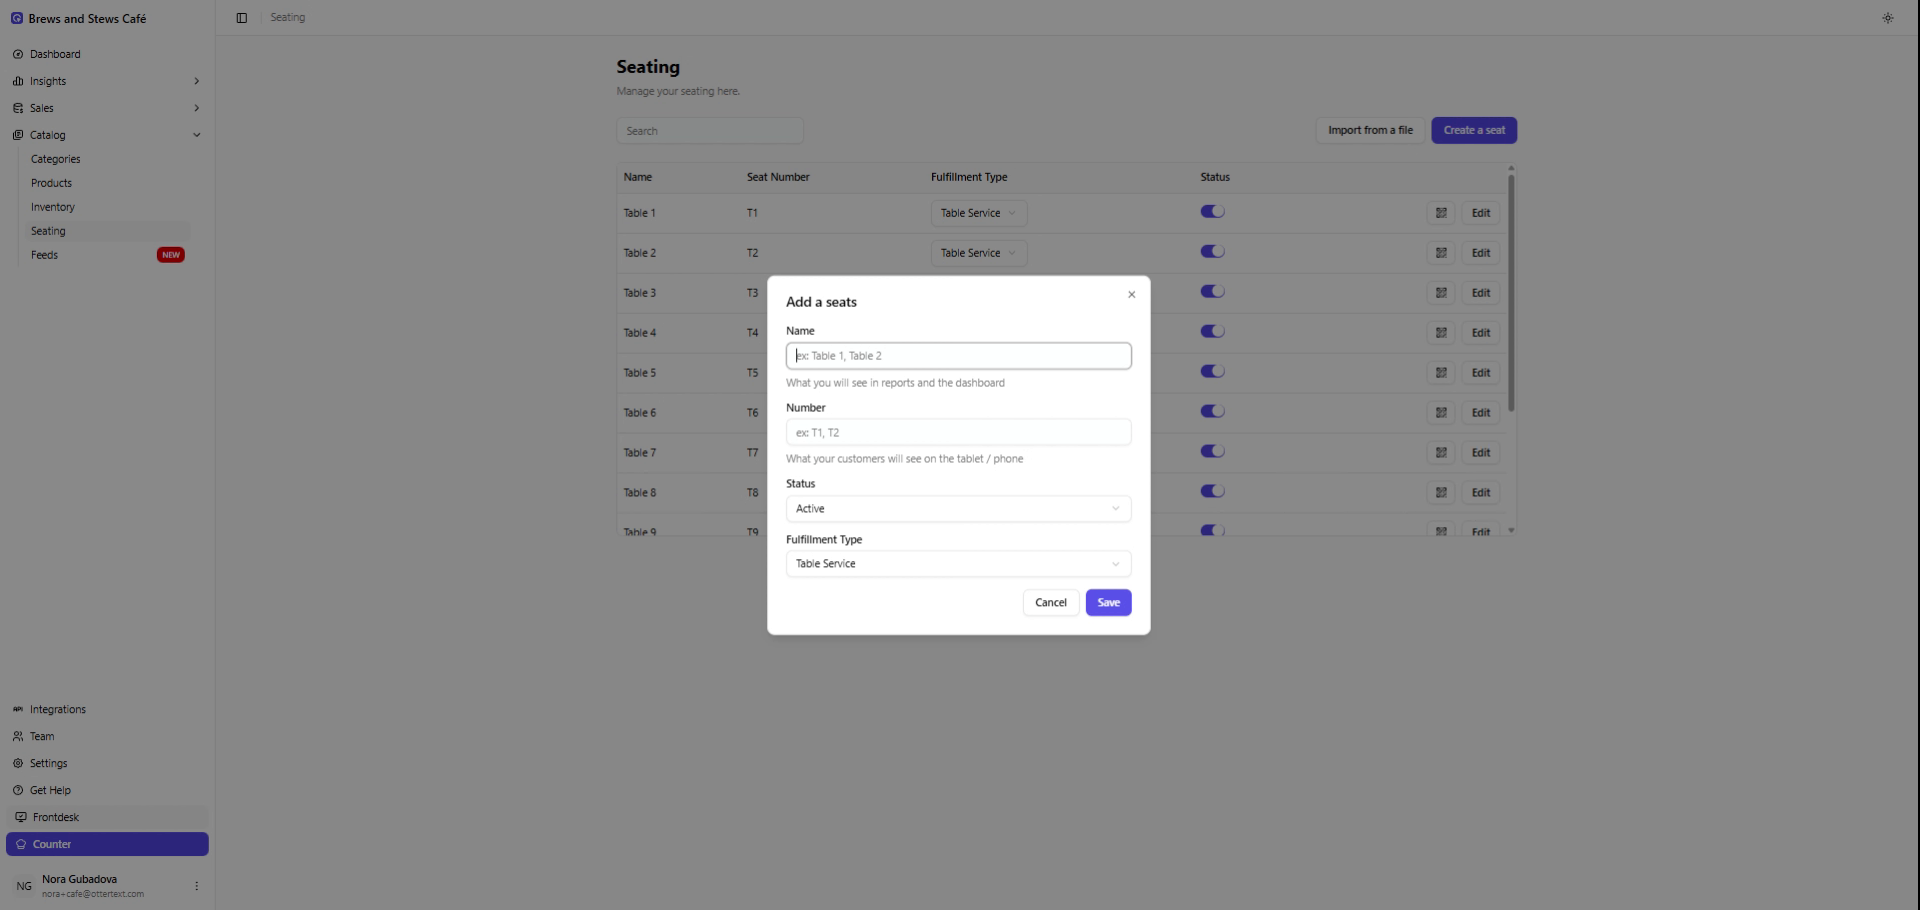
- Choose the Fulfillment Type:
- Table Service – staff deliver orders to the table
- Self Service – customers pick up their own order
- Save the seat.
Taplo will automatically generate a unique QR code for this table.

Download and Place Your QR Codes
Once a seat is created, you can download its QR code and print it.
Attach each printed QR code to the correct table.
Each QR represents a specific seat, so it’s important that _Table 1’s QR is placed on Table 1_, and so on. This ensures orders are routed to the correct location.
How Customers Use QR Ordering
When the customer scans the QR code at their table:
- They are taken directly to your Storefront(your online menu).
- They browse available items, add them to their cart, and complete payment.
- The order appears in your Orders section with the correct table number attached.
- Your team can then deliver the order or prepare it for pickup based on the fulfillment type you selected.
Why Use QR Ordering
QR ordering streamlines dine-in and self-service operations by:
- Reducing wait times
- Eliminating lines
- Ensuring accurate table assignment
- Allowing staff to focus on preparation instead of manual order taking
- Giving customers a modern, familiar ordering experience
You can also place QR codes on counters, in waiting areas, or anywhere customers might want to order without standing in line.